
Hello! It’s July already and that means it’s time for another Build Your Own Collab at The Lilypad. Rachel has five great products included this month and one of them is a layered template. I thought it would be fun to show you a little about templates and how I used this one.
Templates are a great way to put together a digital scrapbook page and are great for new scrappers as well as experienced scrappers. I love to use templates as they give me a place to start, and I often find I end up with a completely unique page. For me, I love seeing how so many different pages end up being created from the same starting point.
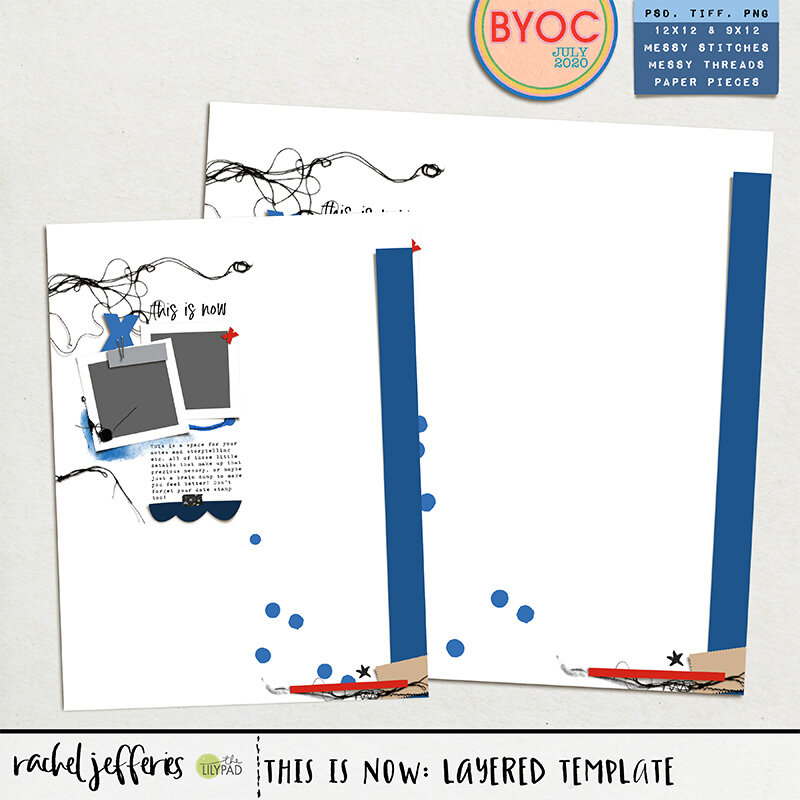
Rachel’s This Is Now Layered Template comes in two sizes and in a few different formats depending on what program you are using. You can use the 12in square page, which is the page size I typically scrap in, or you can use the 9in x 12in rectangular page if you prefer that size. Included in the download is a Photoshop file, a layered TIFF, and PNG formats. Since I use Photoshop, I’ll be focusing on the PSD file.
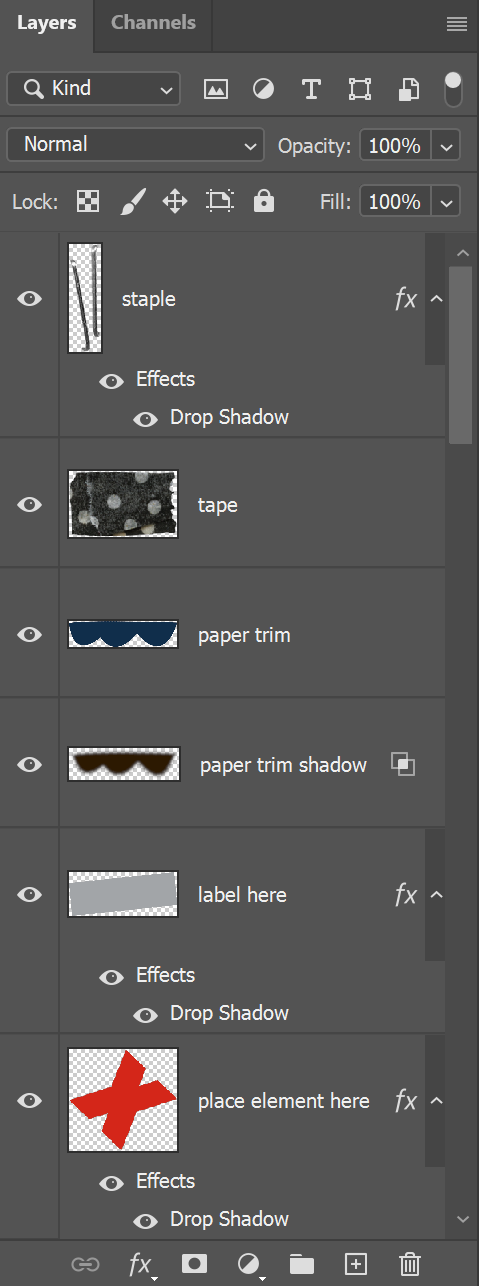
When you open your template in Photoshop, you’ll see a layered version of what is shown in the preview. Look in your layers panel and you’ll notice each layer is labeled, and even better, the layers are already shadowed for you, or a shadow layer has been created below the layer.
These added shadows are great for creating depth and realism in your pages. Rachel’s shadows are fantastic and I find that her shadows help the elements just come right off the screen.
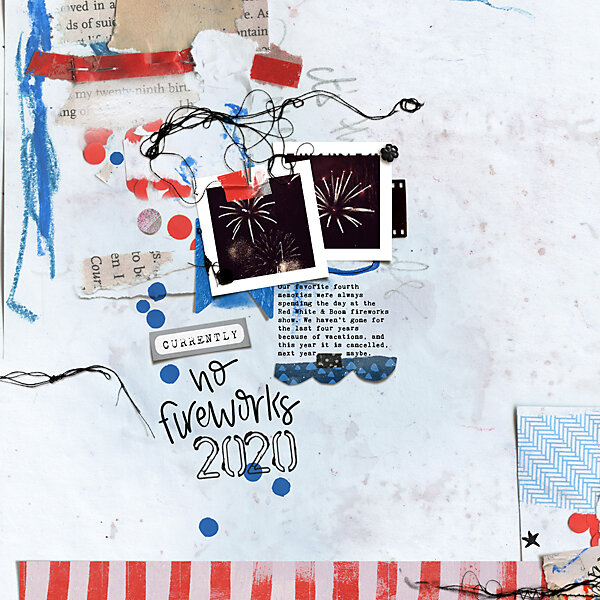
This template comes with two frames for photos, so I started there. I knew, based on the kit colors, that I wanted to do a page about missing the US 4th of July Fireworks this year because of social distancing.
I chose one photo of fireworks and decided to use it twice.
In the layered template there are two layers added to easily clip your photo into the frames that are in the template.

To add your photos, add a layer above the Clip Photo Here layer and paste your photo into the layer. Drag the photo so that it’s covering the clipping layer. Then, you can right click on your photo layer and choose Create Clipping Mask. This will “clip” your photo into the shape of the layer below it, in this case the photo layer inside the frame. The photo now fits nicely in the frame!


Now it’s time to make the template unique to you! With this layered template, you can use it as is, and just add photos or paper, or really turn it into your own page entirely.
You can add papers in the background layer, replace elements, or use them as a clipping mask as well. A nice patterned paper would look great clipped over the scalloped element that Rachel has included. You can move elements to your liking, rearrange elements, or turn the direction of elements.
For my page I decided to use a great Collage Mixed Media Print background that Rachel included in the matching This Is Now: Misc Paperie pack and to include elements from both the This is Now: Misc Bits & Bobs and the Misc Collage Bits & Bobs #1 element packs.


Because I chose a collage background that had a collage arrangement in the same area as the photo placement of the template, I selected all the layers in the template except the background and moved them over to the center of the page. I also took the vertical paper along the right side of the template and turned horizontal and moved it to the bottom so highlight the collage already in the background as well. I did have to change the shadowing on this element after I turned it. Then, using elements from the Bits and Bobs kit, I added a couple of elements under and over the photos to create a bit of clustering. Finally I replaced the included scalloped element and a paper piece in the template with elements included in the Collage Bits pack.
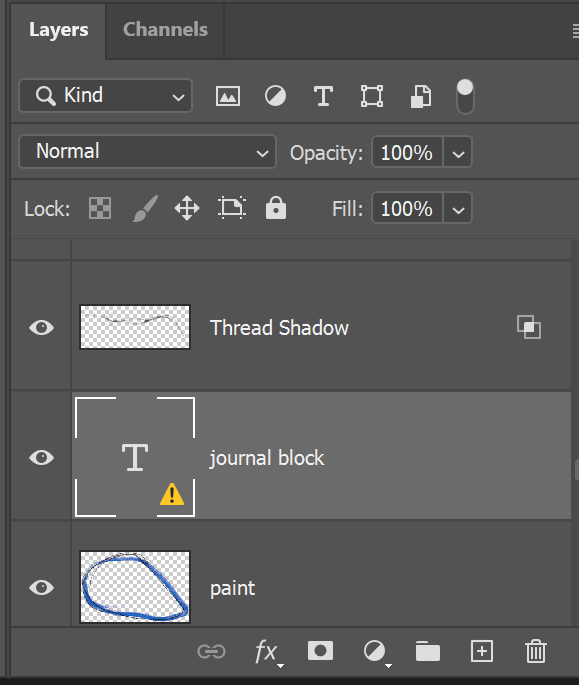
Also included in the Layered Template is a journaling block. Rachel has left this as a text layer so that it can be edited. In the screenshot below, there is a yellow warning on the font layer telling me I don’t have this font in my system. I often find I don’t have the font included on my system, but Photoshop allows you to change the font to one you have. To be honest though, I often go searching for the font that the designer used and have found some of my favorite fonts this way!
For the title work, I chose the Currently tag from the Bits & Bob kit, a bit of my own handwriting, and for the 2020 date, I used Rachel’s Paint and Pen Alpha. I scrap using Photoshop on my Microsoft Surface Pro, so I can easily use my stylus and brush tool to add hand lettering, but you can always use a hand lettered font. Rachel’s Paint and Pen Alpha is a staple in my scrapbooking supplies collection and I use it over and over on layouts all the time.

Here’s my finished layout using the new releases this week. If you haven’t tried a layered template yet, hopefully you got some ideas on how it can be used.
Don’t forget, the Build Your Own Collab packs are on sale through this weekend, starting at 20% off.