Hi again!! Can you believe it’s already August? I’m back again to share a quick technique I use to create depth when layering/clustering elements.
One of the shortcuts I’ve come to rely on is shadow styles. You can make and save your own, and there are even some styles available to purchase out there. While I love using them, when layering and clustering, they can still leave your page looking a little flat. When putting together a cluster of elements with varying widths, the shadows are going to need a little more attention then choosing a layer style.
As with anything in Photoshop there are probably a few different ways to accomplish this, but today I’m going to show you how to use the Burn Tool to add shadows on top of the elements themselves.
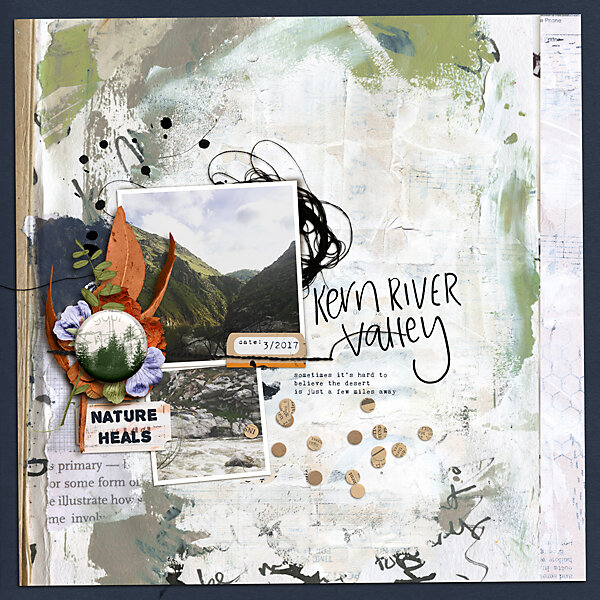
Rachel’s latest kits, Step by Step Mixed Media Paperie, Artistry & Pocket Art, released with the Build Your Own Collection at The Lilypad for August, are perfect for these photos I had of one of my favorite nature getaways.
Once I got my pictures and layout together it was just screaming for a cluster of elements. Here’s the cluster with just shadow layer styles applied.
Once I have the cluster in place and basic shadows applied I change my tool to Burn.
Once you are switched into the burn tool, check the tool settings. I like to make sure the hardness on my burn brush is pretty low, and keep the exposure low as well so I can build the shadow slowly. Change the range between midtones, highlights and shadows depending on your element, I’ll explain when we look at each element we shadow.
My cluster has a large circular flair button centering it. If this was a paper page, that button would be elevated from the page but would also apply pressure to the elements below it, creating not just a shadow from the elevation off the page but darkening each element where they flatten out with the weight of the button on top, creating depth. In this case we will add burn to each element where the button is flattening the element to the page.
Starting with the element layered directly below the button, rub the burn tool along the outter edge of the button, this will darken the element. In our example, the element is a bright blue flower that has a lot of highlights, so if my range is set to Midtones or Shadows you won't notice much change, but if your range is Highlights you can see the dark shadow building.
In this screenshot I have highlighted the area in red where I burned the image with the tool.
Continue moving down the elements flattened by the button, burning where the button touches, but also where the layers above might be pushing down as well. Also keep in mind the range might need to be changed depending on the properties of the elements.
Below are the elements before the burning and then after for you to compare.
As I said there are a couple ways to add shadowing and I find this one gives me a lot of control where the shadowing goes and is pretty quick when you learn how. Hopefully it’s a new tool in your box as well.


